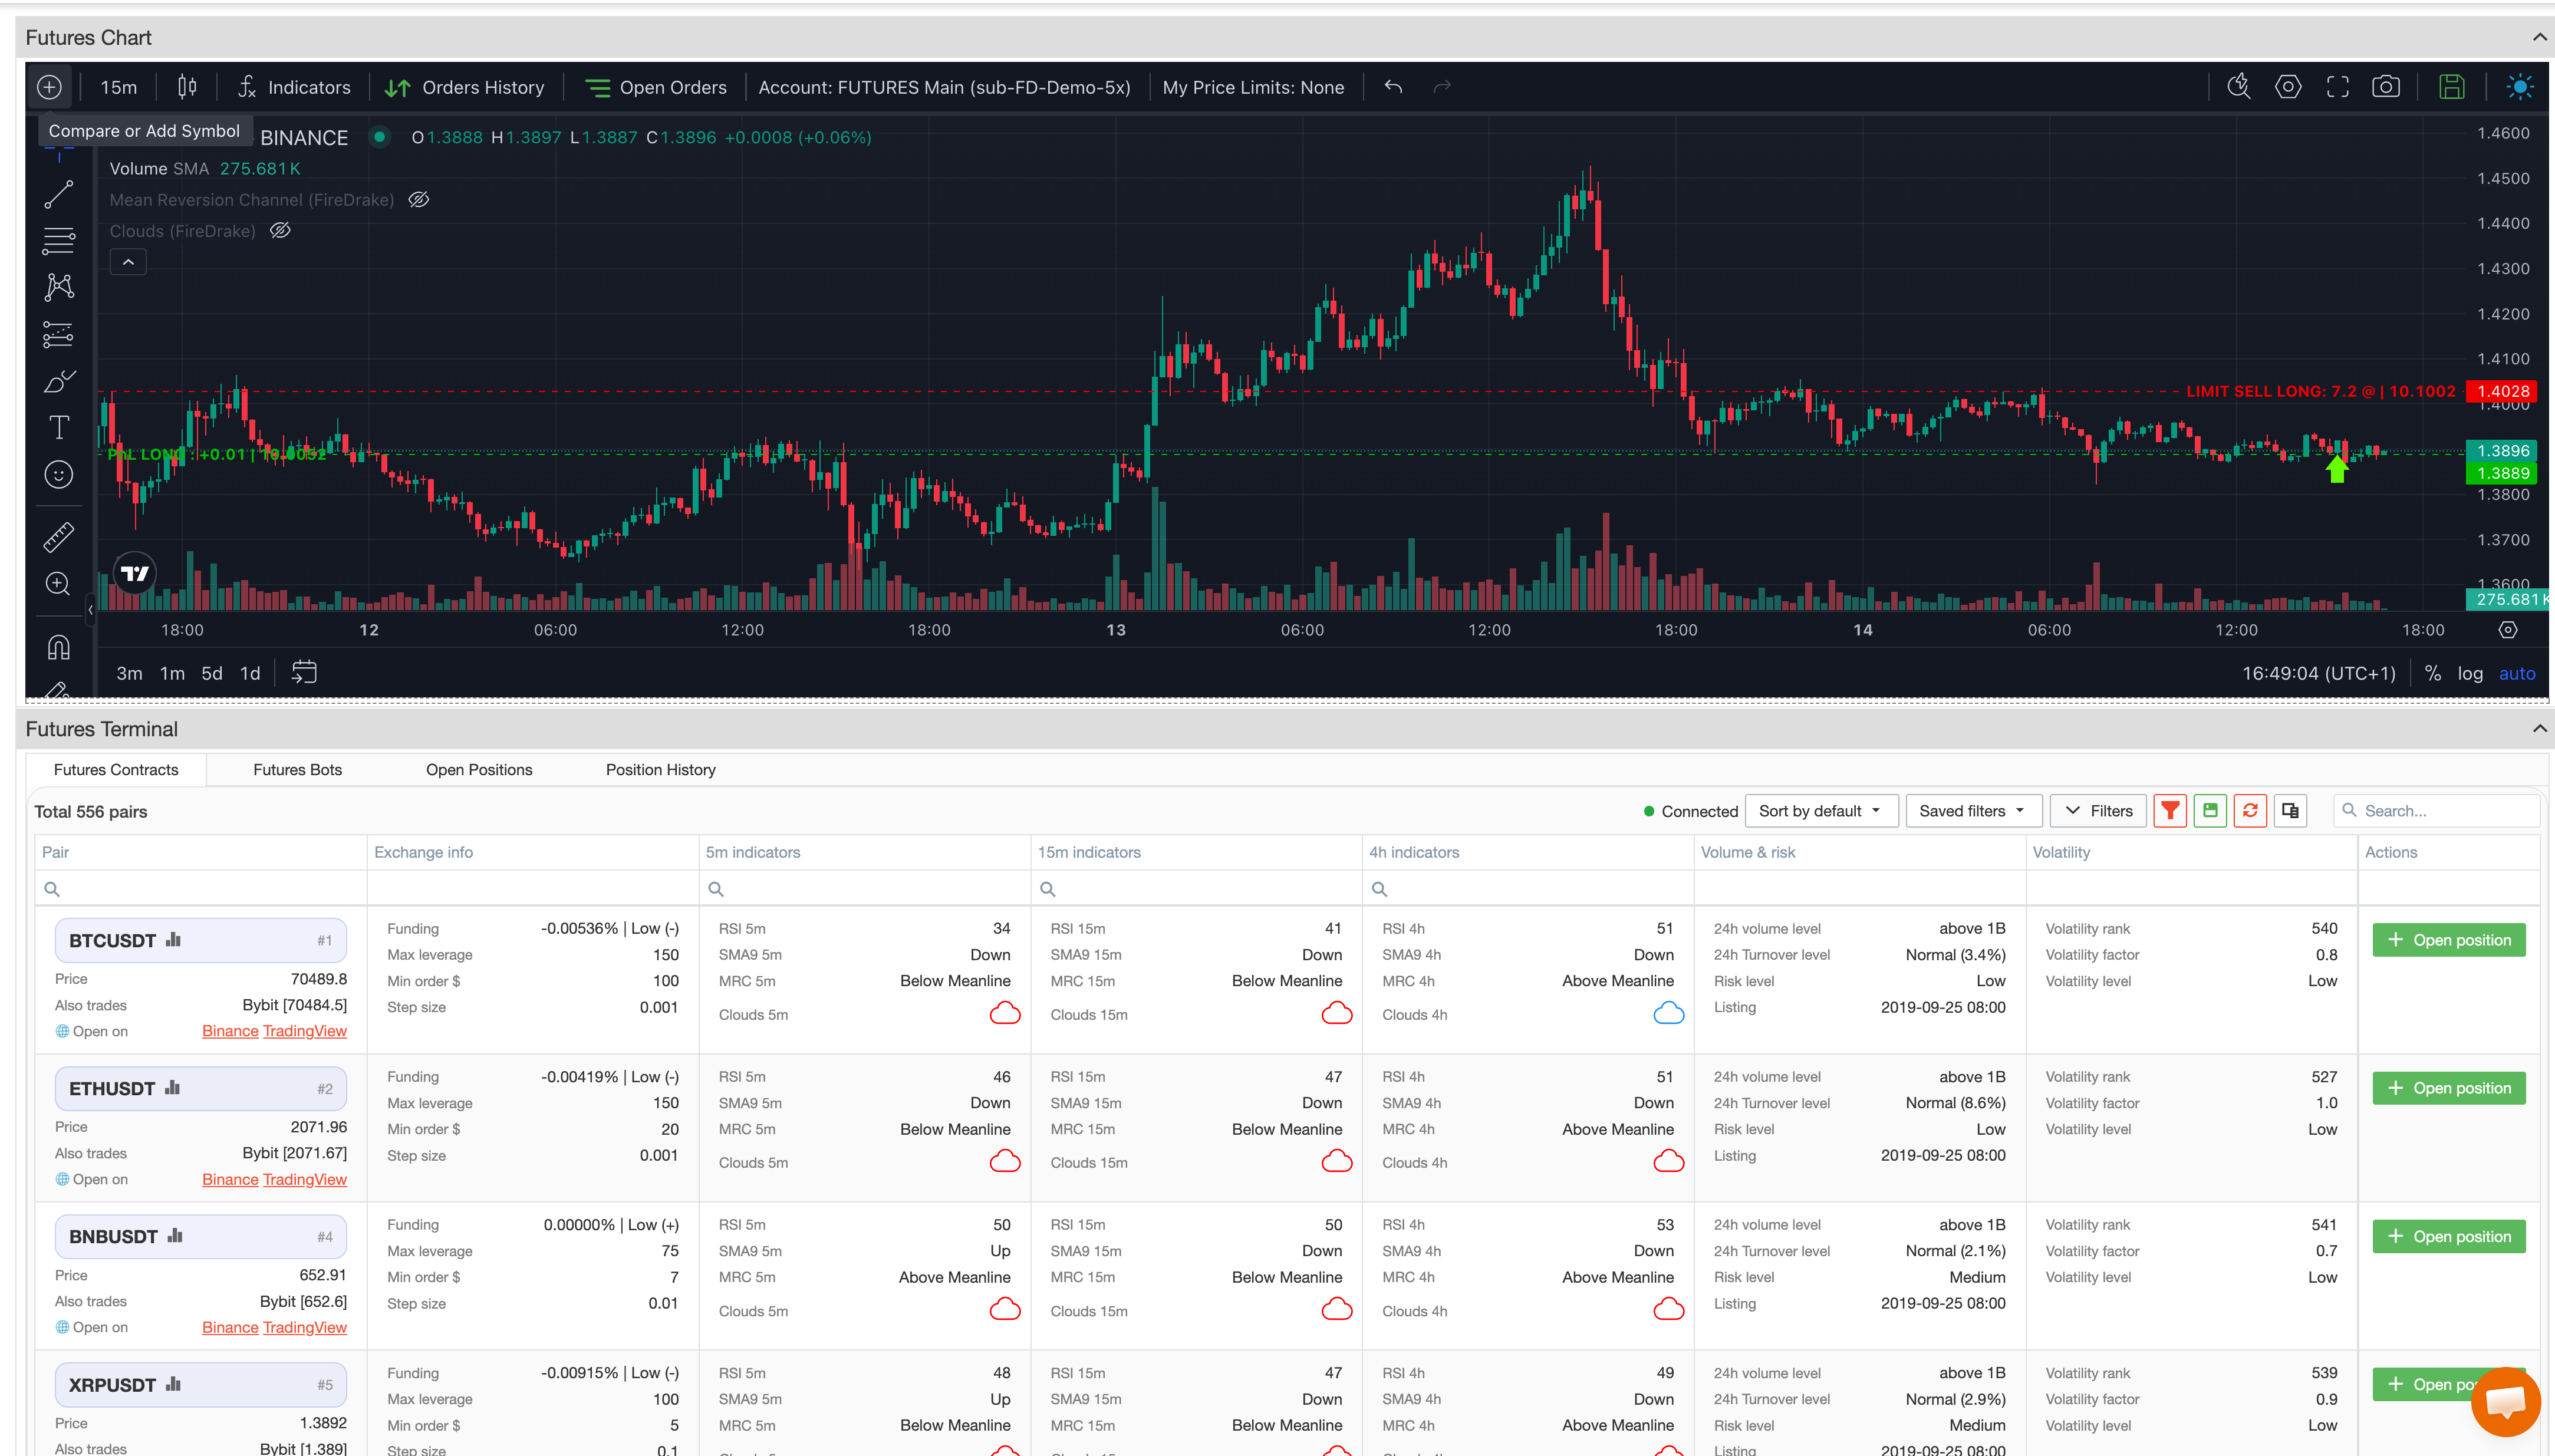
Terminal Screener
The Terminal Screener is the contracts list inside the Futures Terminal.
Use it when you want to scan available futures contracts, narrow the list to instruments that match your approach, and move from screening to position entry without leaving the terminal.
What the screener is for
The screener is designed for practical contract selection.
It helps you:
- browse available futures contracts;
- search for a specific pair or symbol;
- compare contracts by key metrics;
- focus only on instruments that match your conditions;
- open the selected instrument on the chart;
- start the position-opening flow directly from the same workspace.
The screener works both for quick review and for a reusable futures routine.
Advanced Filters
For more precise selection, the screener includes an Advanced Filters window.
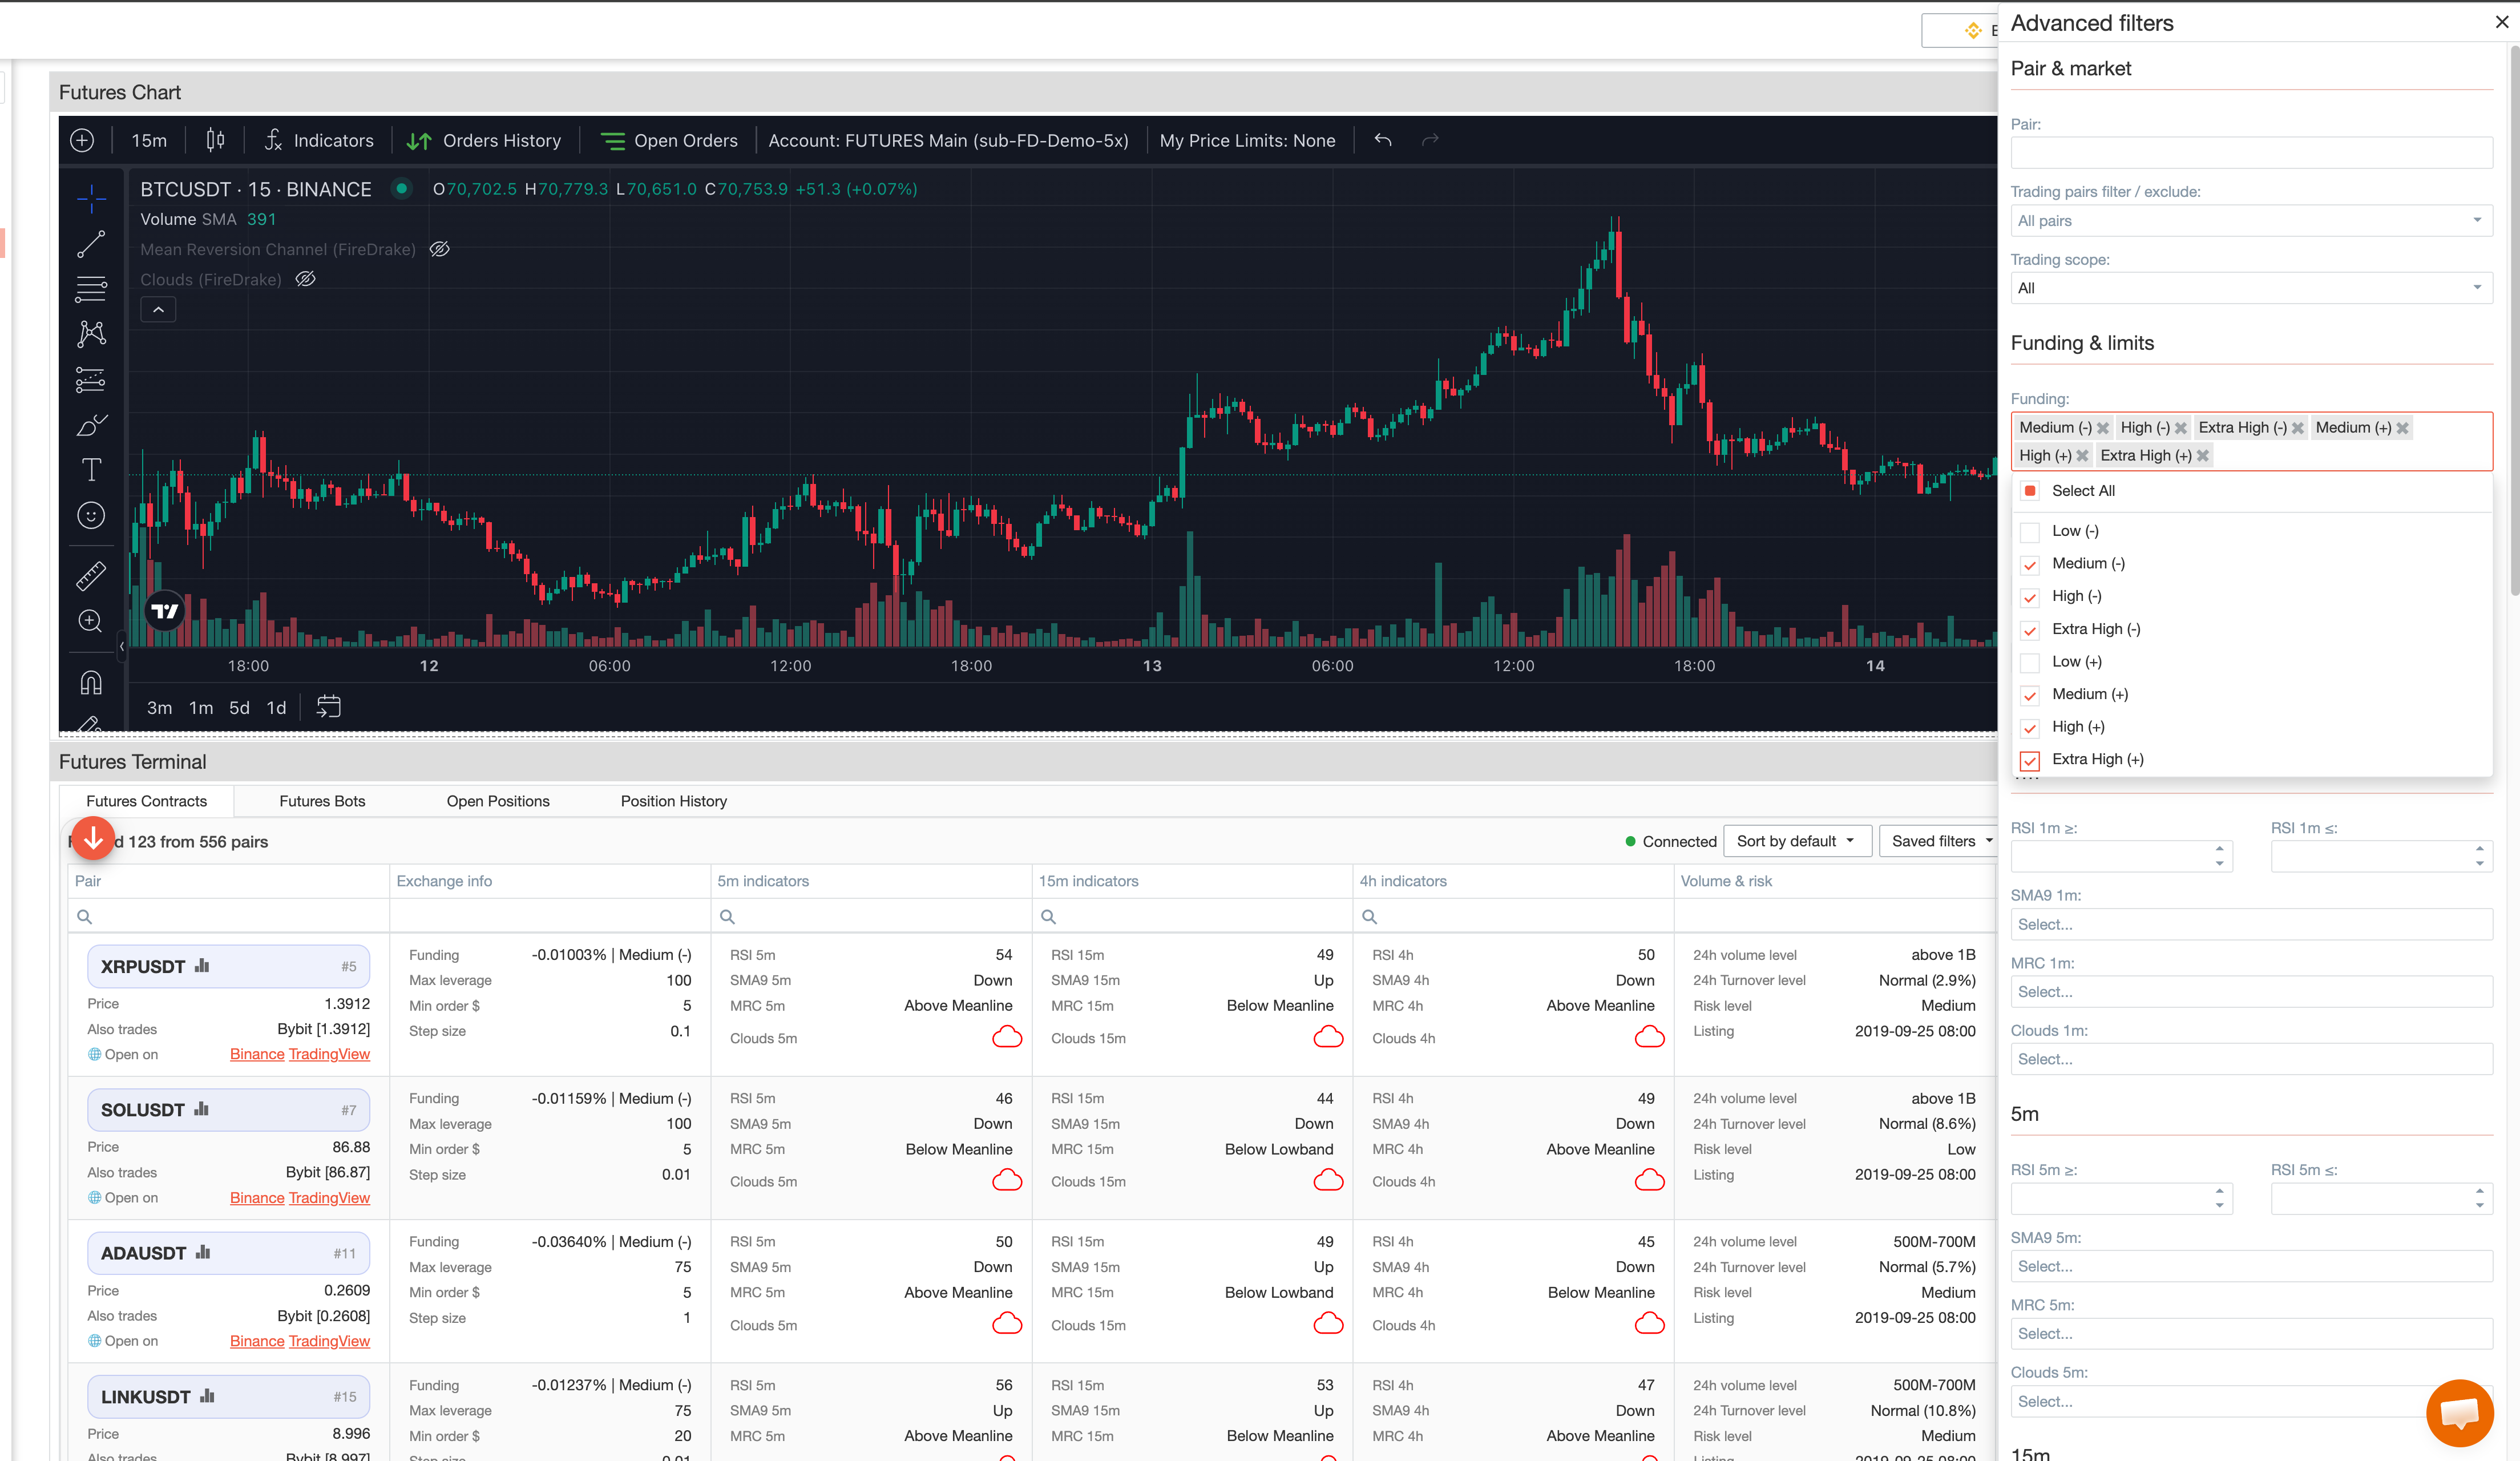
These filters can be used to narrow the contracts list by different types of conditions, including:
- pair or symbol;
- allowed and excluded trading pairs;
- also-traded instruments;
- funding-related conditions;
- max leverage;
- minimum order size;
- step size;
- indicator conditions;
- volume and turnover characteristics;
- risk and volatility characteristics;
- listing-related conditions.
Indicator-based filtering supports multiple timeframes:
- 1m
- 5m
- 15m
- 30m
- 1h
- 4h
Depending on your setup, you can screen contracts using indicators and states such as:
- RSI
- SMA9 direction
- MRC state
- Clouds state
This makes screening more consistent instead of relying only on manual browsing.
Building a repeatable filter setup
The screener is especially useful when you screen the market the same way on a regular basis.
Instead of rebuilding the same filter combination every time, you can prepare a setup that reflects your preferred conditions and then reuse it later.
This works well when you want to monitor several contract groups with different conditions, for example:
- one setup for stronger momentum;
- one for quieter conditions;
- one for higher liquidity;
- one for more selective volatility or risk conditions.
Saved filters and presets
The screener supports saved filter presets.

You can:
- create a filter setup once;
- save it under a clear name;
- apply it again later in one step;
- switch between several saved presets;
- delete presets you no longer need.
One of the main advantages of the screener is that you can move quickly between saved screening modes instead of rebuilding filters each time.
Sorting the contracts list
The screener also provides a dedicated sorting control.
You can quickly reorder the contracts list by one of the available metrics, including:
- rank;
- max leverage;
- minimum order size;
- step size;
- funding;
- 24h volume;
- market cap;
- 24h turnover %;
- volatility factor;
- listing date.
You can quickly bring the most relevant instruments to the top, depending on what matters most for your current review.
Opening a position from the screener
Once you find a contract you want to trade, you can start the position-opening flow directly from the screener.
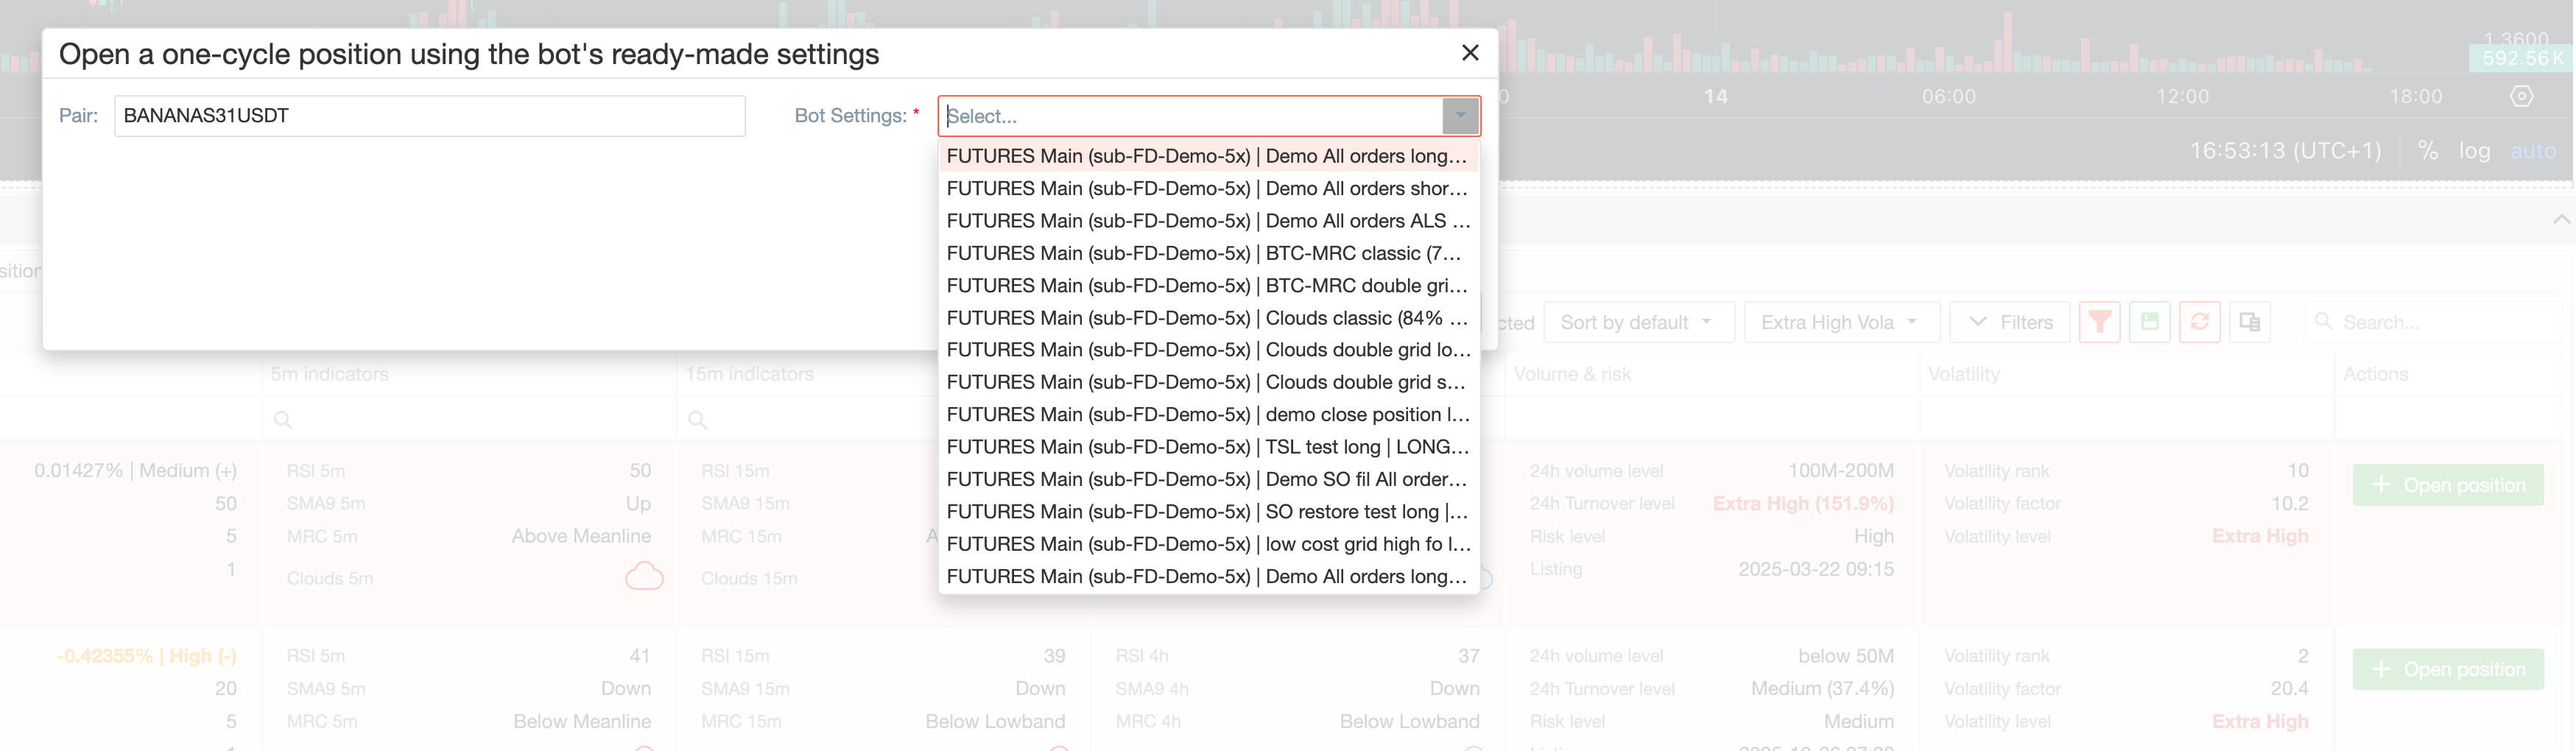
The opening flow is based on selecting a Bot Settings profile.
The screener is used for reviewing contracts and moving from contract selection to position entry.
Here, you choose the pair and then select a prepared bot profile. This is intended for users who want to open a one-cycle position using ready-made bot settings instead of rebuilding the trade parameters manually each time.
Typical workflow
A common workflow in the screener looks like this:
- Open Futures Contracts inside the Terminal.
- Search for a pair or use Advanced Filters.
- Adjust the filtering conditions until the contracts list reflects the setup you need.
- Save the filter preset if you want to reuse it later.
- Use sorting to bring the most relevant contracts to the top.
- Open the selected instrument on the chart if you want an additional visual check.
- Start Open position and select the appropriate Bot Settings profile.
Summary
Use the Terminal Screener when you want to:
- monitor futures contracts by practical criteria;
- use indicator-based filtering across multiple timeframes;
- save and reuse filter presets;
- sort the contracts list quickly;
- move from contract screening to position entry from the same workspace.